


Edit basic information
Edit website information
To edit basic information about your event website:
- Click on
Eventsin the left menu. - Click on your event website in the table. You will get you this page:
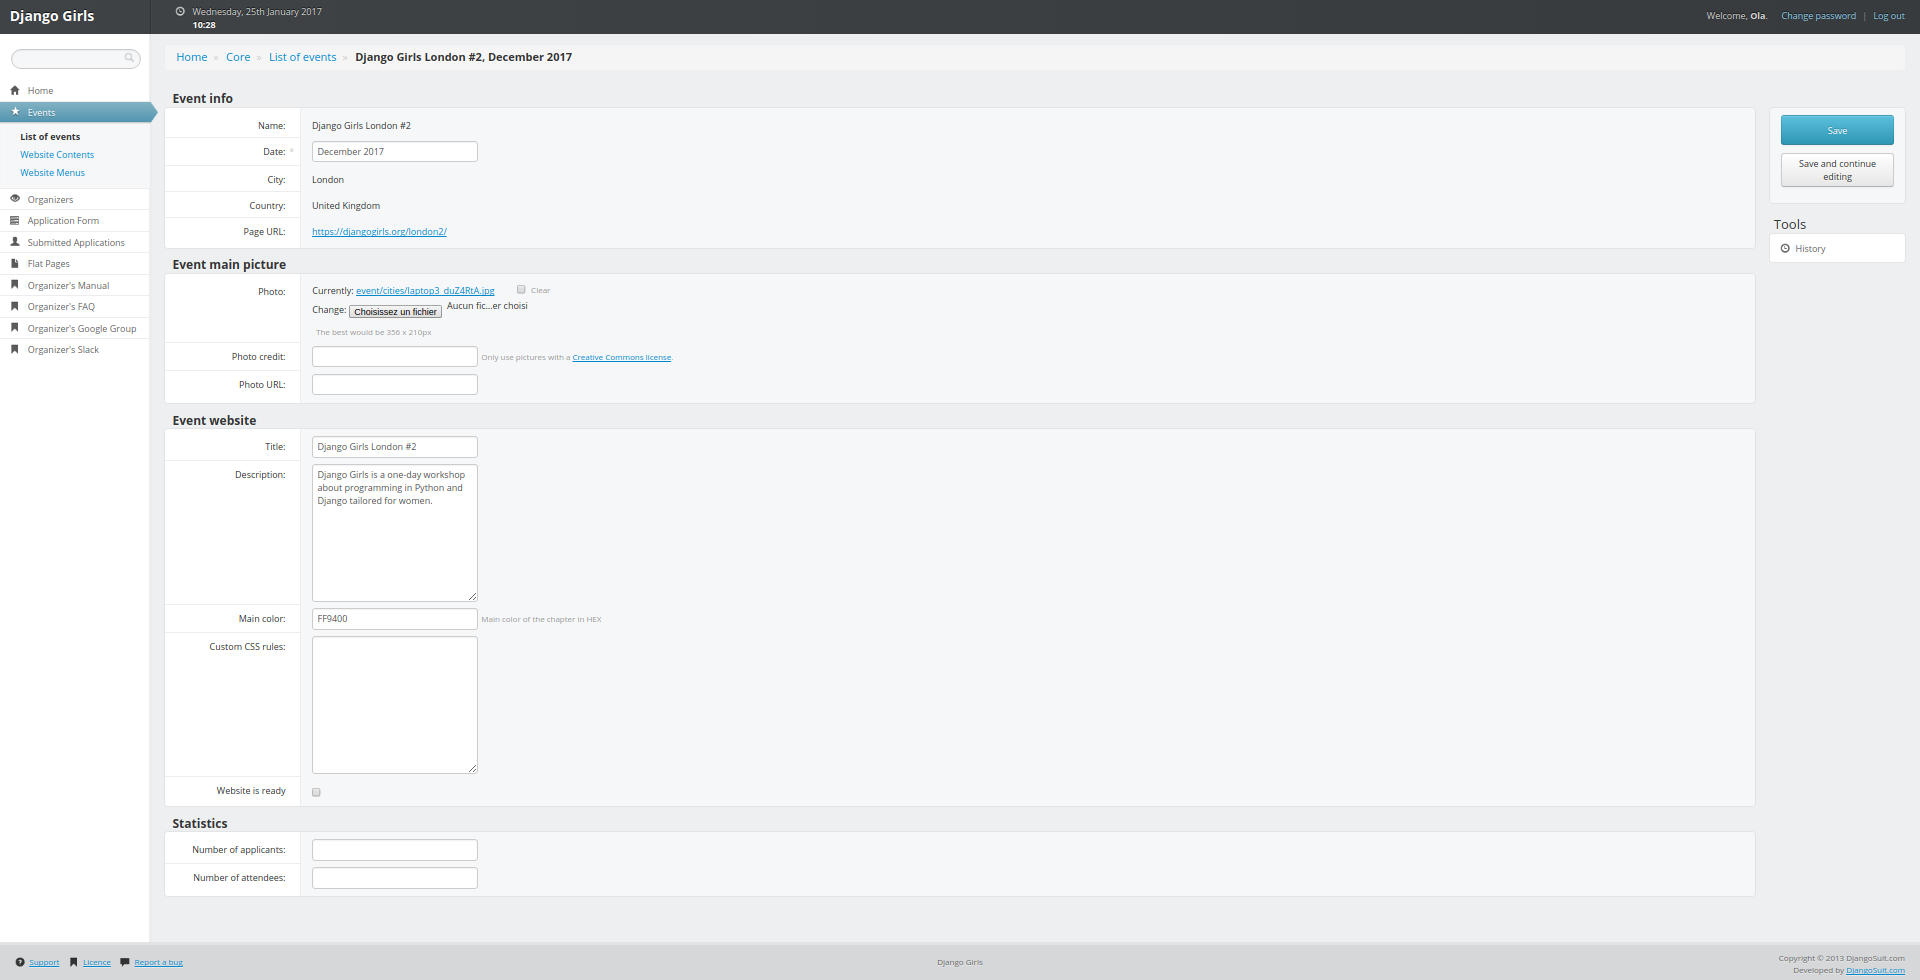
Event info section:
Name,City,Country,Page URL: They represent the name of your event, where it's happening and its website address. You can't edit those fields: if you need to do that, please contact us.Date: You can edit this field if you need to set a more precise date, postpone or delay an event. If you need to cancel your workshop, keep us posted ;)
Event main picture section:
Photo, Photo credit, Photo link: Those fields are connected to the cover picture of your event on the events list page of Django Girls website. We already gave you one so you don't need to edit those fields. If you need to change it, only use pictures under Creative Common License and don't forget to update photo credit and link.
Event website section:
Title: It represents the name of your event website.Description: you can edit or translate this field.Main color: Don't like orange? Chose another color for your website and enter it here in hex format. Try to chose a color on which white text is still readable.Custom css: put extra css here.Website is ready: When you've finished to edit your website content and want to make it live, check this box and click onSavein the right menu. Keep in mind that you don't need to do that to test your website: it will always be live for you and people on your organizing team.
Don't forget to save your modifications by clicking on the Save button in the right menu.
Once your event is done, you won't be able to edit any of those fields. If you need to do that, please send us an email.
Statistics section:
Number of applicants and Number of attendees: when your event is done, don't forget to fill those fields. It will help us keep track of how many people attend Django Girls workshop :)
Don't forget to save your modifications by clicking on the Save button in the right menu.
Add or remove organizer from your team
To add more organizers
In your admin interface:
- Click on
Organizersin the left menu or go here. - Select your event in the drop down list.
- Add the full name of the new organizer.
- Add the email their email address.
- Click on the
Add organizerbutton.
Redo those steps for every organizer you want to add.
To remove organizers
In your admin interface:
- Click on
OrganizersandRemove organizersin the left menu or go here. - Click on the event you want to edit.
- Click on
Removenext to the person you want to remove. - Confirm you want to remove the person.
Redo those steps for every organizer you want to remove.